
Connect Channels to Grok web
Keep Grok and Cloud Projects open in separate tabs. You need a Grok account with custom connectors and a Socra Project you can manage. For a Grok team, ask its administrator if custom connectors are unavailable.
1. Start in Grok
Open Grok Connectors, then choose Plugins → Connectors → New Connector → Custom.

Choose New Connector, shown here at a larger reading size:
Enter Socra Channels as the name and this Server URL:
https://channels.socra.cloud/mcp
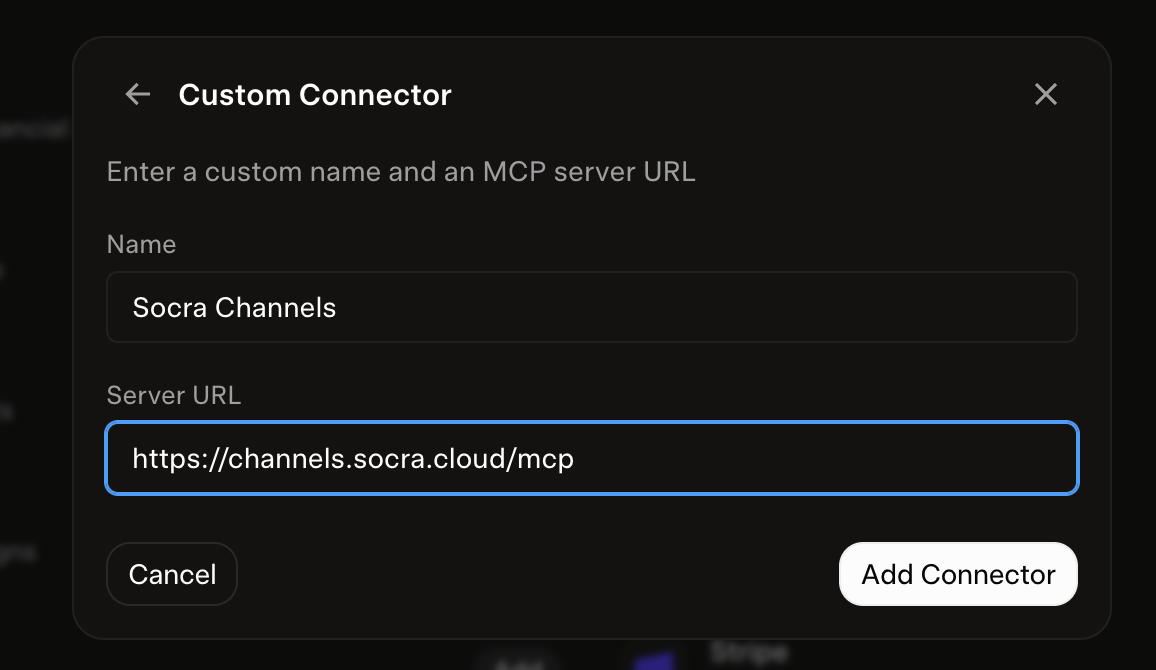
Select Add Connector. Grok discovers the server and opens OAuth Credentials Required. Keep that form open while you prepare its client ID in Platform.
If Socra Channels is already connected to the Account you intend to use, open that connector and continue at Check tools. If you deliberately add another connection, choose a distinct name. A duplicate name can keep Add Connector disabled.
2. Prepare the Project in Platform
In Cloud Projects, choose the Account for this connection. You can use a Project you manage or create one.
The page opens Manage Cloud Projects. Select Switch Projects, search for the Project by name or ID, then select its row. This switches the active Project and closes the manager. Confirm the Project name in the console’s Switch Cloud Project control before continuing.
If you opened a Project’s inspection details instead, use Back to list → Switch Projects, then select its row. If the details say Active Cloud Project, close the manager with its close button to return to the console. Keep that Project selected throughout the following steps.
Open Enabled services → Enable service, select Channels, and enable it. Check that Channels appears in the enabled list. An enabled service still needs the Grok authorization below.
Open OAuth → Overview. If the Project has no OAuth configuration, select Set up OAuth, enter Channels for Grok as the application name, complete the required consent information, and save it. If configuration already exists, preserve it and continue to OAuth → Clients.
If Platform shows Access needed, copy its access request for the Project owner. Keep the selected Project and use Check access again after the owner resolves it.
3. Register the public client
In OAuth → Clients, select Create client and enter:
| Field | Value |
|---|---|
| Client name | Channels for Grok |
| Application type | Single-page app |
| Redirect URLs | https://grok.com/connectors-oauth-exchange-code/ |
| JavaScript origins | Leave empty |
Keep the final slash in the redirect URL. Select Create client and copy its client ID from the client details. This public client uses PKCE; leave the client secret empty in Grok.
4. Authorize in Grok
Return to OAuth Credentials Required and enter the client ID you copied.
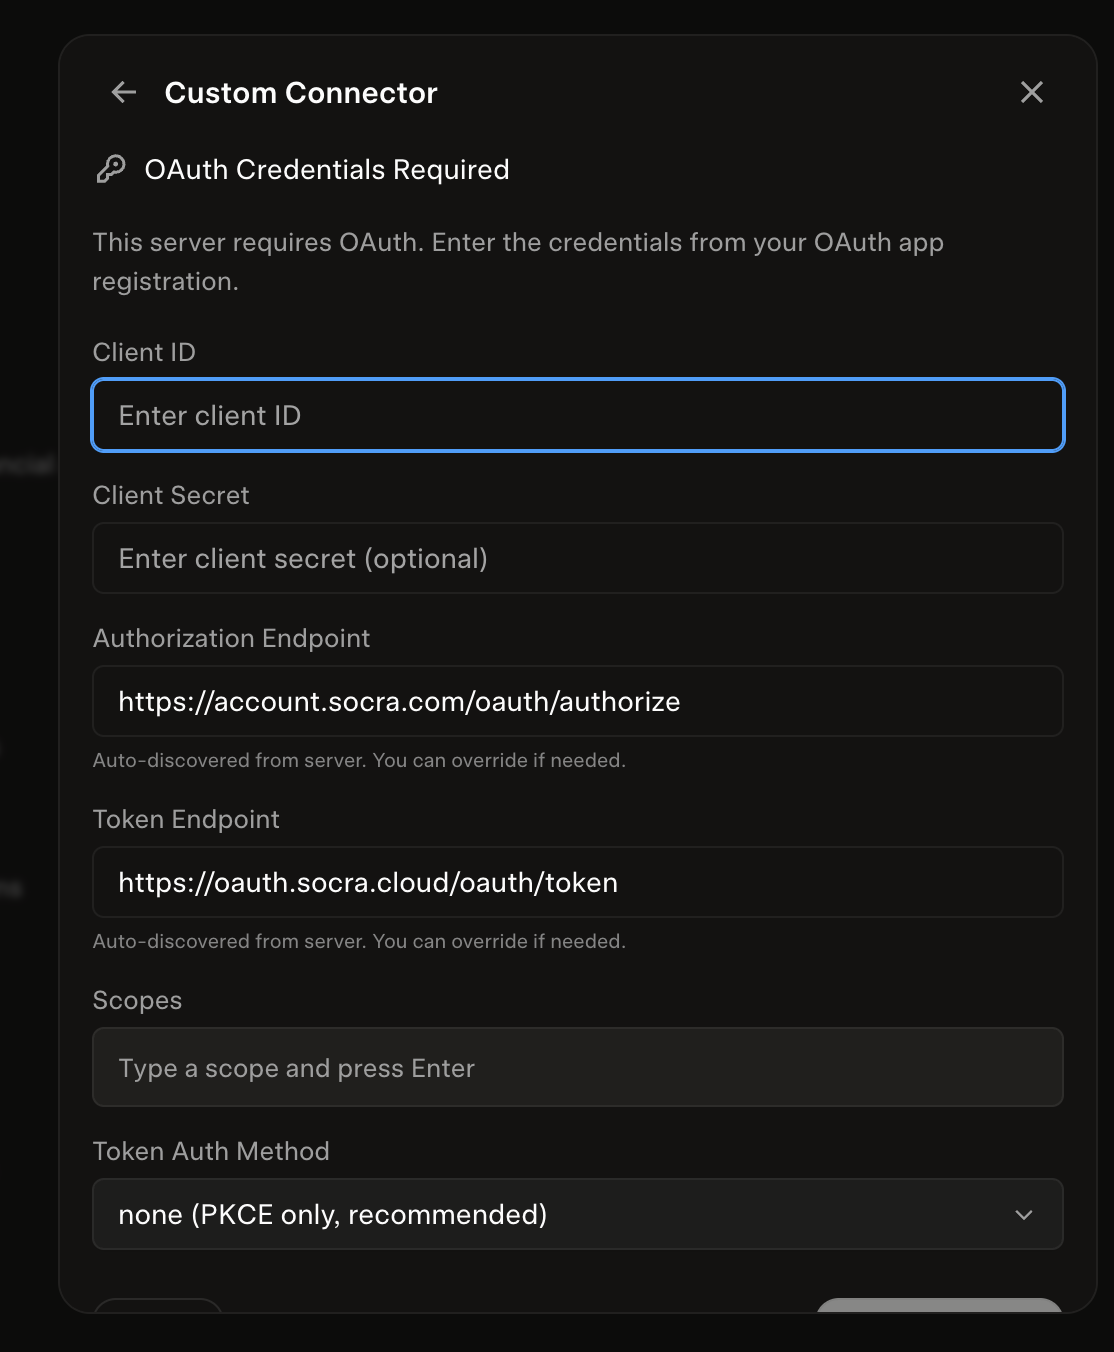
| Field | Value |
|---|---|
| Client ID | Your new client ID |
| Client Secret | Leave empty |
| Authorization Endpoint | Keep https://account.socra.com/oauth/authorize |
| Token Endpoint | Keep https://oauth.socra.cloud/oauth/token |
| Scopes | Leave empty |
| Token Auth Method | none (PKCE only, recommended) |
Scroll within the dialog to reach Save & Connect. You can also press Tab from Token Auth Method to reach the bottom actions.
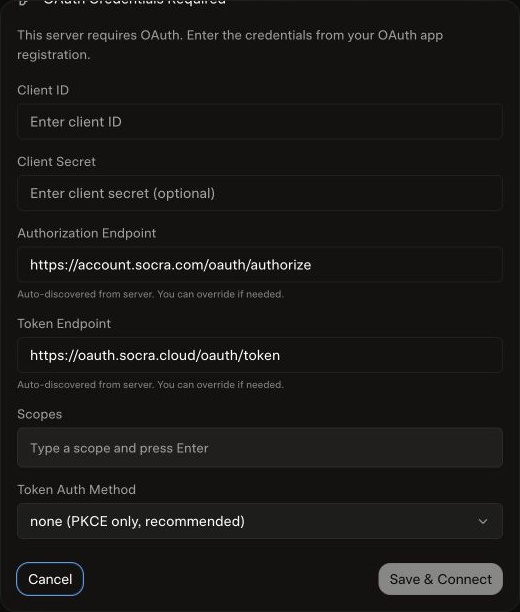
Select Save & Connect. Allow the sign-in popup if your browser blocks it, sign in to Socra, choose the Account you use in Channels, and approve access. Return to Grok and confirm that your connector appears under Connected with the name you saved.
If you cancel or close authorization, return to the connector and connect again. If authorization fails, compare the client ID, Single-page app type and exact redirect URL with the client in your selected Project. Confirm that Channels is enabled in that same Project before retrying.
5. Check tools
Open your connector under Plugins → Connectors and check its tools. Enable Channels List if it is off. Selecting an enabled tool toggles it off, so check its current state first.
Review any approval Grok requests for a tool call. Connector authorization and tool availability are separate checks.
6. Verify with a read
Start a new Grok conversation and send:
Use Socra Channels to make exactly one channels_list tool call with limit 1. Do not read messages or send, create, update or delete anything. Report whether the call succeeded. An empty list is valid.
Expand the tool record and confirm that Channels List ran with limit: 1 and returned a result. A successful empty list confirms the read. A reply without a tool execution does not confirm the connection.
If the call reports an access or service error, preserve its text. Confirm your authorized Account, the enabled Channels service in the client's Project, and the tool toggle before retrying. Ask the relevant Account or Project owner to resolve a denied permission. Share the error and approximate time with Socra support, keeping credentials and private conversation content out of the report.